JoliGEN Inference
JoliGEN reads the model configuration from a generated
train_config.json file that is stored in the model directory. When
loading a previously trained model, make sure the the
train_config.json file is in the directory.
Python scripts are provided for inference, that can be used as a baseline for using a model in another codebase.
Generate an image with a GAN generator model
If you followed the Quickstart GAN, you can skip the two first steps (get data and model) and use your own pretrained model.
Download data
Download the dataset:
wget https://www.joligen.com/datasets/noglasses2glasses_ffhq.zip
unzip noglasses2glasses_ffhq.zip
mkdir datasets
mv noglasses2glasses_ffhq datasets/noglasses2glasses_ffhq
rm noglasses2glasses_ffhq.zip
Download a pretrained glasses removal model
Download a pretrained model:
wget https://joligen.com/models/joligen_model_gan_glasses2noglasses.zip
unzip joligen_model_gan_glasses2noglasses.zip
mkdir checkpoints
mv glasses2noglasses/ ./checkpoints/
rm joligen_model_gan_glasses2noglasses.zip
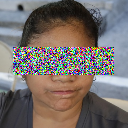
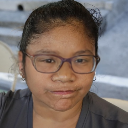
Run the inference script
cd scripts
python3 gen_single_image.py --model_in_file ../checkpoints/glasses2noglasses/latest_net_G_A.pth --img_in ../datasets/noglasses2glasses_ffhq/trainB/img/00005.jpg --img_out target.jpg
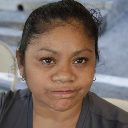
The output file is the target.jpg image in the current directory:

|

|
original image given as input to the model |
|
Generate a video with a GAN generator model
The same model will be used as the one presented in Style transfer on BDD100K.
Download the video & pretrained model
wget https://www.joligen.com/models/clear2snowy_bdd100k.zip
unzip clear2snowy_bdd100k.zip -d checkpoints
rm clear2snowy_bdd100k.zip

wget https://www.joligen.com/datasets/vids/051d857c-faeca4ad.mov
Run the inference script
cd scripts
python3 gen_video_gan.py\
     --model_in_file ../checkpoints/latest_net_G_A.pth\
     --video_in ../051d857c-faeca4ad.mov\
     --video_out ../snowy-video.avi\
     --img_width 1280\
     --img_height 720\
     --max_frames 2000\
     --fps 30\
     --gpuid 0
The output file is the snowy-video.avi video in the parent directory.
You can optionnally use --n_inferences to apply the model on the frames multiple
times. this would increase the amount of snow generated by the model.
You can also use the --compare flag to concatenate the generated frames with
the original frames of the video.
Generate an image with a diffusion model
If you followed the Quickstart DDPM, you can skip the two first steps (get data and model) and use your own pretrained model.
Download data
Download the dataset:
wget https://www.joligen.com/datasets/noglasses2glasses_ffhq.zip
unzip noglasses2glasses_ffhq.zip
mkdir datasets
mv noglasses2glasses_ffhq datasets/noglasses2glasses_ffhq
rm noglasses2glasses_ffhq.zip
Download a pretrained glasses insertion model
Download a pretrained model:
wget https://joligen.com/models/joligen_model_ddpm_noglasses2glasses.zip
unzip joligen_model_ddpm_noglasses2glasses.zip
mkdir checkpoints
mv noglasses2glasses/ ./checkpoints/
rm joligen_model_ddpm_noglasses2glasses.zip
Run the inference script
mkdir noglasses2glasses_inference_output
cd scripts/
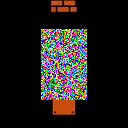
python3 gen_single_image_diffusion.py --model_in_file ../checkpoints/noglasses2glasses/latest_net_G_A.pth --img_in ../datasets/noglasses2glasses_ffhq/trainA/img/00002.jpg --mask_in ../datasets/noglasses2glasses_ffhq/trainA/bbox/00002.jpg --dir_out ../noglasses2glasses_inference_output --img_width 128 --img_height 128
The output files will be in the noglasses2glasses_inference_output
folder, with:
|

|
|

|

|
|

|
|
|
|
|
|
|
|
Generate an image with a diffusion model conditioned by class
Download data
Download the dataset:
wget https://www.joligen.com/datasets/online_mario2sonic_lite.zip
unzip online_mario2sonic_lite.zip -d datasets
rm online_mario2sonic_lite.zip
Download a pretrained Mario insertion model
Download a pretrained model:
wget https://joligen.com/models/joligen_model_ddpm_mario.zip
unzip joligen_model_ddpm_mario.zip -d checkpoints
rm joligen_model_ddpm_mario.zip
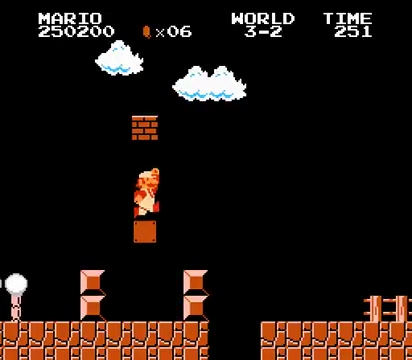
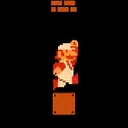
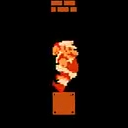
Run the inference script
The --cls parameter controls the pose for Mario (1 = standing, 2 = walking, 3 = jumping, etc).
mkdir mario_inference_output
cd scripts/
python3 gen_single_image_diffusion.py --model_in_file ../checkpoints/mario/latest_net_G_A.pth --img_in ../datasets/online_mario2sonic_lite/mario/imgs/mario_frame_19538.jpg --bbox_in ../datasets/online_mario2sonic_lite/mario/bbox/r_mario_frame_19538.jpg.txt --dir_out ../mario_inference_output --img_width 128 --img_height 128 --mask_delta 10 --cls 3
The output files will be in the mario_inference_output folder, with:
|
|
|

|

|
|

|
|
|
|
|
|
|
|
Generate an image with a diffusion model conditioned by Canny sketch
Download data
Download the dataset:
wget https://www.joligen.com/datasets/mapillary_lite.zip
unzip mapillary_lite.zip -d datasets
rm mapillary_lite.zip
Download a pretrained Mapillary model
Download a pretrained model:
wget https://joligen.com/models/joligen_model_ddpm_mapillary.zip
unzip joligen_model_ddpm_mapillary.zip -d checkpoints
rm joligen_model_ddpm_mapillary.zip
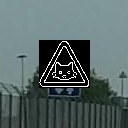
Run the inference script
The --cond_in parameter specifies the conditioning image to use.
mkdir mapillary_inference_output
cd scripts/
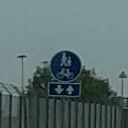
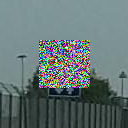
python3 gen_single_image_diffusion.py --model_in_file ../checkpoints/mapillary/latest_net_G_A.pth --img_in ../datasets/mapillary_lite/trainA/images/UbLxBV0FEP_FfEgGi0YhIA.jpg --bbox_in ../datasets/mapillary_lite/trainA/bbox/UbLxBV0FEP_FfEgGi0YhIA.txt --dir_out ../mapillary_inference_output --img_width 128 --img_height 128 --mask_delta 10 --alg_diffusion_cond_image_creation canny --alg_diffusion_sketch_canny_thresholds 100 400 --cond_in /path/to/conditioning_image.png
The output files will be in the mapillary_inference_output folder, with:
|

|

|
|

|
|
|
|
|
|
|
|
Generate a video with diffusion model for inpainting
Download the testdataset & pretrained model
wget https://www.joligen.com/models/mario_vid.zip
unzip mario_vid.zip -d checkpoints
rm mario_vid.zip

wget https://www.joligen.com/datasets/online_mario2sonic_full.zip
unzip online_mario2sonic_full.zip -d online_mario2sonic_full
rm online_mario2sonic_full.zip
Run the inference script
cd scripts
python3 gen_vid_diffusion.py\
     --model_in_file ../checkpoints/latest_net_G_A.pth\
     --img_in ../image_path\
     --paths_file ../datasets/online_mario2sonic_full/trainA/paths.txt\
     --mask_in ../mask_file\
     --dir_out ../inference_mario_vid\
     --img_width 128\
     --img_height 128\
The output files will be in the inference_mario_vid folder, with mario_video_0_generated.avi for the generated video and mario_video_0_orig.avi for the original frames.